
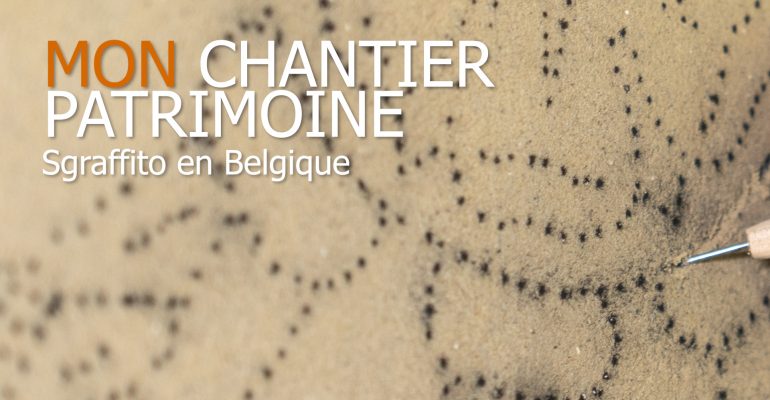
Sgraffito, Brussels icon
If there is an iconic decorative technique in Belgium it is sgraffito from the Art Nouveau period: an explosion of color, gold and design in the facades of houses, private hotels, and businesses. We are in a restoration project at the Paix-Dieu Abbey, Heritage Trades Center in Amay, Belgium where we are going to learn how to apply this decorative technique to walls.
We invite you to explore this experience, accompanied by master craftsmen: Manuel Cardoso, Marc Frognet and Raphaël Pausé.
Manuel Cardoso, prestigious professional and trainer, specialist in iconology, tells us about the history of the technique, its importance in the history of architecture and the extraordinary marriage with art nouveau in Belgium.
Sgraffito is a decorative technique involving scraping or incision of a fresh coating… It is a centuries-old technique that can be traced back to prehistory since engraving is one of the first artistic techniques that humanity knew: we engraved the stone then we engraved bone, pottery…
It was during the Italian Renaissance that the technique was practiced as a decorative art for facades…
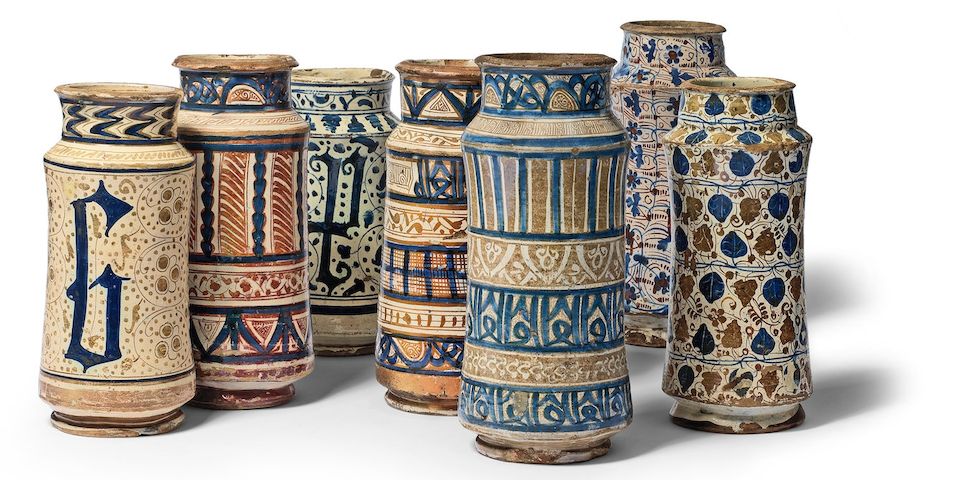
The technique arrived in Italy with the tradition of majolica through trade with the Moorish Spaniards at the end of the Middle Ages. Italy therefore fully appropriated the technique, initially, to manufacture traditional medicine pots (albarelli), but the outpouring and artistic and intellectual vitality of the time propelled sgraffito onto the facades.
We are now in the midst of the Italian Renaissance, particularly in Florence…
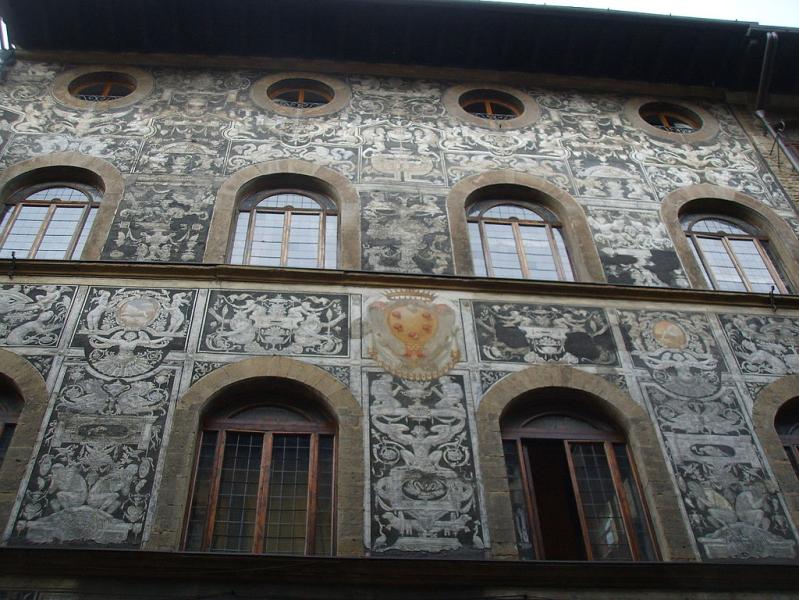
One of the most beautiful facades in Florence is that of the palace given by the Grand Duke Francesco de Medici to his lover, Bianca Cappello, after the death of her husband. Built (or renovated, according to some) by Bernardo Buontalenti, it was located near his residence, the Pitti Palace, the better to torment his unloved wife, Joan of Austria.
The sgraffito was added by Bernardino Pocetti, a master of the art, who (naturally) included the Medici "balls" and the Cappello hat crest ("hat" in Italian), as well as a complete encyclopedia of Renaissance fantasies.

Palazzo Medici Riccardi: Inner courtyard / 1445-60 /Photo / Via Camillo Cavour, Florence
The term sgraffito is also a heritage of the Italian language, it comes from sgraffiare which means to scratch who gave sgraffito, so scratched. And it is an essential stage in the history of sgraffito, which takes place during the Renaissance and in Tuscany. From the 15th century, the old incision process evolved, fully finding its vocation in all phases of Florentine art and marking the image of the city until the 17th century.
This spectacular development is based on an improvement in the technique, the evolution towards two tones (white and silver gray) allowing greater readability of the pattern from a distance and proving particularly suitable for decorating facades.
Florentine sgraffito is typically bichrome and this style will remain in use until the middle of the 16th century. It will be closely linked to the growing importance given to drawing in the Florentine School. The sgraffitoes will take over entire facades and will sometimes combine the two-tone technique and fresco medallions. Then, the technique will be enriched with earths, ochres, and finally other pigments and can compete with easel painting.
In 15th century palaces, we often find an imitation of a brickwork, emphasizing the geometric composition which tends to govern the entire facade (palazzo Bardi-Busini 1515). The decoration initially focuses mainly on the bands and around the bays and then, we witness an increasingly dense ornamental development, the facade is entirely dressed and true specialists in grotesque decoration appear.
One of the most spectacular sgraffito facades is without context the Lanfredini Palace in Florence (https://it.wikipedia.org/wiki/Palazzo_Lanfredini)
THE PRINCIPLES OF A SGRAFFITE
The magic of sgraffito requires several operations ranging from preparing the wall to creating the actual decor.
Marc Frognet, craftsman specializing in lime and sgraffito restoration, and also a trainer at Paix-Dieu, explains to us how sgraffito is made to better understand each step:
The surface of the wall to be decorated is coated with several layers of mortar (consisting of sand and lime) superimposed.
- The grip layer or gobetis
This is an essential and very important step: it ensures that the sgraffito holds well on the brick support.
- The dressing layer
It is a leveling layer which evens out the surface of the wall (bricks). It makes it possible to homogenize the bottom, its thickness varies from 1 to 3 cm. Its finish is irregular and grainy.
- The bottom layer, dark in color, tinted with black or red, has a thickness of 3 mm to 10 mm, which will give a depth, a vibration, typical of sgraffito.
- The surface layer, light in color (it is not tinted) and on which we transfer the outline of the drawing, is very thin in thickness, from 1 to 2 mm.
The drawing is an original creation by a sgraffito artist or chosen from a catalog in the workshop, the pattern is reproduced at real size on a stencil or tracing paper. The pattern is transferred to the fresh coating using the stencil technique or by tracing through a tracing paper. The contours of the design are immediately incised using a scraper to reveal the lower layer of mortar. By tracing in dotted lines then scratching the outline of a drawing, the black reappears to give thickness and volume to the line.
- Decorative part : lime color painting.
A dark furrow demarcates the different surfaces of the model which are then colored.
- Gilding. Some details can be enhanced with gold.
This is an outdoor technique. We apply the gold leaf to the mixture, in transfer.
What tools are used for engraving? Marc Frognet presents the tools for engraving
The hand of the craftsman: Marc Frognet shows us how to engrave a sgraffito:
To engrave the pattern, you must hold the blade of the knife or the chosen tool at 45 degrees to direct the release of the mortar. In fact, if we cut perpendicularly, the mortar crumbles on both sides of the cut line.
As you cut, remove the remaining coating with the blade, dust off the grains and smooth the cutting line with a dry brush.
Finally, you must scrape off the remains of mortar and clean the contours of the frieze dry with the brush.
Now that we know the principles of sgraffito, let's get to work with Marc Frognet and Raphaël Pausé who will explain the secrets of lime coating to prepare the wall before scratching.
Sgraffito: Summary
It's time to bring out the black light from the sgraffito. Nicolo, one of the site's interns, will show us this experience step by step.
The sample
Practice the gestures and sleight of hand on a sample to gain practice. We built small panels from scratch with black base coat and top coat to try out our first sgraffito.
Make the clichés
We make a small preparatory drawing on which we have already chosen the patterns and colors. We prepare the template. The stencil is a full-size drawing of the subject made on thick kraft or tracing paper, the lines of which are pierced with small holes using a serrated wheel or a needle.
Transfer the dotted design onto the coating
Place the stencil on the fresh coating and pass dark pigment through the perforations of the stencil using a doll. In this way we obtain the exact reproduction of the design on the coating.
A doll is made of a piece of thin fabric filled with pigments and closed like a pouch the size of an onion. We tap this doll on the perforated lines of the stencil in order to deposit pigment on the coating and to have everything traced.
This first visible sketch helps guide the scratching
Scratch
We incise the design in the still fresh clear coating following the outline of the dotted lines.
Paint the patterns in color
Search for tints, paints, shadows and lights
The coloring of the panels is carried out using different painting techniques. Here we used paint a secco which consists of applying a coat of paint to a coating that has set. The pigments must therefore be mixed with a binder: tempera, oil, mineral paint. We used the latter type. Milk of lime results from the incorporation of water into lime, until a material of fluid consistency is obtained to which pigments are added according to the desired color.
Before painting the sgraffito frieze, we try the colors and shades to express the light and shadow in a sample to ensure that they achieve the desired result.